
I’ve been covering a lot of compiler/interpreter related content lately so I figured for today’s post I would do something a bit different. I’ve always found the study of cellular automata to be fascinating. A while back I wrote a series of posts about implementing and optimizing another cellular automata called Langton’s Ant which exhibits interesting “emergent behaviors”. For that project I used Java’s swing library to handle the graphics, a task for which that library is not particularly well suited.
For today’s post I will be implementing what is arguably the most famous, and certainly the most studied cellular automaton: John Conway’s “Game of Life“. Unlike my posts on Langton’s Ant, I will be using C++ for the actual implementation. Additionally, I have intentionally implemented the game logic so that it is completely decoupled from the graphics and user interface logic. The open source library SFML is used for rendering the graphics and handling user input. So without further ado, let’s get started.
The Game
The Game of Life isn’t really a game in the way one normally thinks when talking about computer games. As I mentioned above, Life is a cellular automata, which is a model of computation related to turing machines. So what does that mean? Put simply, its a way of mapping an input to an output for a given mathematical function – in other words: a state machine.
The “game”‘ is “played” on an unbounded grid. Each grid space is in one of two possible states: alive or dead. Each “move” is one “tick” of a hypothetical “clock” and the state of the board for each tick is called a “generation”. Aside from the initial generation – which is either configured by the user or seeded at random – the state of each grid position(called a “cell”) in the next generation is determined by the state of that position, and the state of the cell’s surrounding it in the current generation according to a simple set of rules. A cell’s neighbors are those cell’s that fall in the “Moore neighborhood” of the current position. Because computer memory is a finite resource, we simulate an unbounded grid by using a toroidal array through the use of the modulus operator.

The rules for determining what the current position in the next generation is determined by the following rule set:
If the current cell is “Alive”:
- If the cell has less than 2 live neighbors, It dies from loneliness.
- If the cell has more than 3 live neighbors, it dies from overcrowding.
- If the cell has exactly 2 or 3 live neighbors, it lives on to the next generation.
If the current cell is “Dead”
- If the cell has less than 3 live neighbors it stays dead from lack of population
- If the cell has more than 3 live neighbors it stays dead from lack of resources
- If the cell has exactly three live neighbors, cue the baby making music because that cell is coming to life.
Implementing Life
The algorithms themselves for Life are fairly simple. If you’re not careful though, there are a few places where making the wrong design choice can lead to very poor performance. For each position, you need to gather information on its neighbors. As such, we want to limit the number of iterations we perform over the board for each tick. The “board” is represented by a simple 2D boolean array seeing as a cell can only ever be in one of two states at time.
When computing the next generation, the changes should be reflected on a new board as mutating the same board you’re reading will result in inaccurate results. At the same time, you don’t want to have to allocate a new board and free the old board every generation, as both allocating and freeing a large 2d array are expensive operations. There are a few ways we can address this issue. The most straightforward method is to maintain two boards through out the life of the game. After each “tick” the two arrays will swap roles. This can be seen below by the two 2d arrays ‘board’ and ‘buffer’ as well as the boolean variable ‘pass’.
class Life {
    private:
        int ticks;
        bool pass;
        int height;
        int width;
        bool **board;
        bool **buffer;
        vector<pair<float,float>> liveCoords;
        void init();
        void lives(int x, int y);
        void dies(int x, int y);
        bool isAlive(bool **curr, int x, int y);
        int checkNeighbors(bool **curr, int x, int y);
        void evaluatePosition(bool** curr, int x, int y);
    public:
        Life(int w = 100, int h = 50, int seed = 1337);
        Life(const Life& life);
        ~Life();
        vector<pair<float,float>> doTick();
        Life& operator=(const Life& life);
};
The constructor is provided the width and height of the board (for viewing purposes, the board its self is ‘unbounded’), as well as the seed number, which is the number of cells which will initially set to being alive. I wont cover the copy constructor, destructor, or assignment operator, but you should implement them, seeing as we allocate the arrays dynamically. After setting the width and height, we allocate and initialize the two board arrays. Once that is complete, we seed the board with live cells and set pass to true.
Life::Life(int w, int h, int seed) {
    width = w;
    height = h;
    init();
    for (int i = 0; i < seed; i++) {
        board[rand() % height][rand() % width] = true;
    }
    pass = true;
}

void Life::init() {
    board = new bool*[height];
    buffer = new bool*[height];
    for (int y = 0; y < height; y++) {
        board[y] = new bool[width];
        buffer[y] = new bool[width];
        for (int x = 0; x < width; x++) {
            board[y][x] = false;
            buffer[y][x] = false;
        }
    }
}
A generation is computed by a call to doTick(), which determines which array to read from and which array to write from based on the value of pass. When pass is set to true we use the state of the current position on the ‘board’ array to set the next state for that position on the ‘buffer’ array, and perform the opposite when pass is set to false. This effectively “swaps” the roles of the two arrays each pass.
vector<pair<float,float>> Life::doTick() {
    liveCoords.clear();
    bool **currentGeneration = pass ? board:buffer;
    for (int y = 0; y < height; y++) {
        for (int x = 0; x < width; x++) {
            evaluatePosition(currentGeneration, x, y);
        }
    }
    pass = !pass;
    return liveCoords;
}
One tick iterates over every position in the board, applying the rules we covered above to each position, the end result being the next generation. When the tick has completed, we negate the pass flag and return the list of live cells.
void Life::evaluatePosition(bool** generation, int x, int y) {
    int lc = checkNeighbors(generation, x, y);
    if (isAlive(generation, x, y)) {
        if (lc == 2 || lc == 3) {
            lives(x, y);
        } else {
            dies(x, y);
        }
    } else {
        if (lc == 3) {
            lives(x, y);
        } else {
            dies(x, y);
        }
    }
}
When evaluating the position, the first step is to count the number of live cells surrounding the current position. This is done by adding an offset to the current positions x and y coordinates to generate the neighbors coordinate. If the neighbor is alive, we increment a counter. This is done for all 8 surrounding cells, returning the total at the end.
int Life::checkNeighbors(bool **curr, int x, int y) {
    int liveCells = 0;
    int dx[8] = {-1, 0, 1,1,1,-1, 0,-1};
    int dy[8] = {-1,-1,-1,0,1, 1, 1, 0};
    for (int i = 0; i < 8; i++) {
        int nx = ((dx[i]+x)+width) % width;
        int ny = ((dy[i]+y)+height) % height;
        liveCells += isAlive(curr, ny, nx);
    }
    return liveCells;
}
Once we have the number of live neighbors, we can set the next generations state based on whether the current position is alive or not. Take note that we also take this opportunity to cache the live cells to a list. This is done to avoid having to iterate over the array a second time to determine which cells to render as alive and which are dead. We’ve already determined that when generating the next generation, we don’t want to perform the same task twice!
bool Life::isAlive(bool **curr, int x, int y) {
    return curr[y][x];
}

void Life::lives(int x, int y) {
    if (!pass) {
        board[y][x] = true;
    } else {
        buffer[y][x] = true;
    }
    liveCoords.push_back(make_pair((float)x,(float)y));
}

void Life::dies(int x, int y) {
    if (!pass) {
        board[y][x] = false;
    } else {
        buffer[y][x] = false;
    }
}
That completes the actual business logic for Life. If however, we want something more entertaining than a list of x/y coordinates for our effort, then we need to develop a way of rendering the board graphically.
Rendering The Game of Life With SFML2
The Simple and Fast Media Library (SFML) is an open source cross-platform library that is primarily intended for developing games. It is more than suitable for our purposes. The official website links to a bunch of tutorials and also has great documentation to help get you up to speed with using the library. For something as simple as Life, we will only be using a VERY small subset of what the library has to offer.
class App {
    private:
        void sleep();
        void drawLiveCells();
        void render();
        void handleEvent(sf::Event& event);
        int width;
        int height;
        Life life;
        sf::RenderWindow* window;
    public:
        App(int w = 100, int h = 50);
        void start();
};
Our application will use a very simple event loop to drive an instance of life, with each iteration of the loop performing a call to Life::doTick() and then rendering the results. I also add a simple event handler to capture certain keystrokes to either re-start the current instance of life, or exit the application.
 App::App(int w, int h) {
    height = h;
    width = w;
    life = Life(width, height);
}

void App::start() {
    sf::Event event;
    window = new sf::RenderWindow(sf::VideoMode(width*10, height*10), "The Game of Life");
    texture = new sf::RenderTexture();
    texture->create(width*10, height*10);
    window->setFramerateLimit(60);
    while (window->isOpen()) {
        while (window->pollEvent(event)) {
            handleEvent(event);
        }
        render();
    }
}

void App::handleEvent(sf::Event& event) {
    if (event.type == sf::Event::Closed) {
        window->close();
    }
    if (event.type == sf::Event::KeyPressed) {
        switch (event.key.code) {
            case sf::Keyboard::R:
                window->clear();
                life = Life(width, height);
                break;
            case sf::Keyboard::Q:
            case sf::Keyboard::Escape:
                window->close();
                break;
            default:
                break;
        }
    }
}
The start() method contains the actual game loop. Before we start the game loop, we initialize the render window. We scale the window to ten times the size of our array, and everything else will be scaled to the same amount during rendering. This is so simplify the mapping of the cells to the array and from the array to the pixels of the render window.
void App::drawLiveCells() {
    float XSCALE = 10.0, YSCALE = 10.0;
    sf::RectangleShape rect;
    rect.setSize(sf::Vector2f(XSCALE, YSCALE));
    rect.setFillColor(sf::Color::Green);
    auto coords = life.doTick();
    texture->clear(sf::Color::Black)
    for (auto m : coords) {
        rect.setPosition(m.first*XSCALE, m.second*YSCALE);
        texture->draw(rect);
    }
    texture->display();
}

void App::render() {
    window->clear();
    drawLiveCells();
    sf::Sprite screen(texture->getTexture());
    window->draw(sprite);
    window->display();
    sleep();
}

void App::sleep() {
    std::this_thread::sleep_for(350ms);
}
The actual drawing is very simple as well. We begin by clearing the window and calling the render cells method. In this method we draw objects onto a texture instead of straight to the screen. We Set the background to black (the color of dead cells), we then make the call to Life::doTick() to retrieve the list of cells to draw. Once we have the list of living cells, we render each living cell by drawing a green rectangle at the position of the live cell. The size of the rectangle is determined by the amount we are scaling. When all the rectangles are drawn, we call the sf::RenderTexture::display() method to make the texture visible. With the texture prepared, the only thing left to do is apply the texture to something, in this case a sprite, which is then drawn on the window and displayed. I added a sleep() method, otherwise the states would change so rapidly you wouldn’t be able to watch it.
You might be wondering why we draw on a texture and then draw the texture on the window instead of just drawing straight onto the window. The reasons are two fold: the first is for performance, this is a pattern as old as time in graphical programming called “blitting”. Drawing to the screen is much much slower than drawing to a texture. The second reason is because it makes saving the generated graphics as an image file very simple. For more information on SFML I highly suggest reading through the tutorials on the official website.
Running Life
With our GUI and game logic complete, all that’s left to do is compile our application and enjoy the fruits of our labor. The main application is actually very small, thanks to our use of the MVC design pattern:
#include <iostream>
#include "app.hpp"
using namespace std;

int main(int argc, char* argv[]) {
    srand(time(0));
    App app;
    app.start();
    return 0;
}
When building an application that uses SFML you have to link against it during compilation, this is done by adding the following flags when compiling with G++:
g++ app.cpp life.cpp main.cpp -o life -lsfml-window -lsfml-graphics -lsfml-system
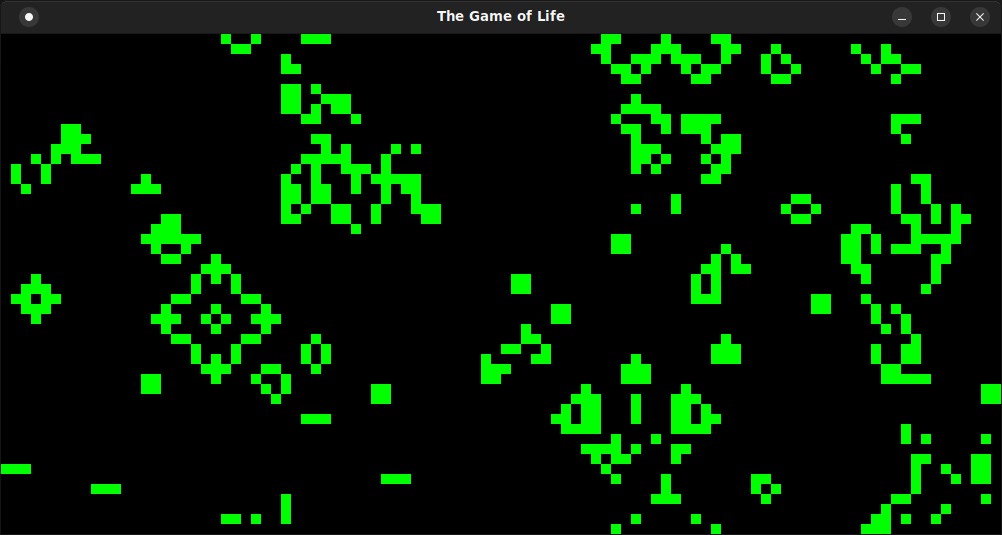
After compiling and running the application you will be greeted with a window that looks something like this, albeit alive with movement(The gif at the top was generated from this code):
That’s all I’ve got for today. Until next time, happy hacking!
If you would like the full code for the project shown here, it is available on my GitHub